Billy, where have you been all my life? I'm a latecomer to Billy bookcases but it turns out they have been around for 30+ years. The factory that produces the Billy bookshelf makes 15 Billys a minute. That's 3.1 million a year! Wow! After buying three of my own, I can see why they are so popular. They are sturdy, easy to assemble and reasonably priced.
I shared my small (but growing) office library for Met Monday, HERE.

Before my Billy bookcases looked like this...

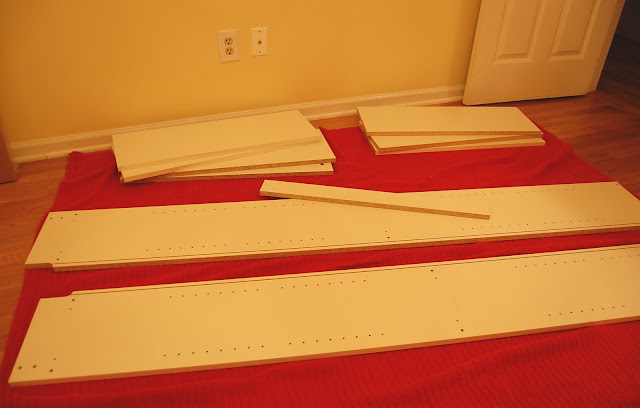
They looked like this.
As I shopped IKEA on the day I purchased the Billy shelves, I was not really looking forward to putting them together. I won't go so far as to say I dreaded it...but I was just a tad apprehensive.
Many years ago we bought a very large desk with a hutch from an office store, and it had to be assembled. It was a complete nightmare, taking hours and hours. In the end, a crucial part (a door) was missing! I'm thrilled to share, putting together the Billy shelves was the complete opposite experience.
The first thing you notice are ALL of the instructions are done in pictures...no words. At first I was a bit worried...okay, a lot worried. Directions with no words...huh? I'll never worry about that again with anything I buy from IKEA. They have obviously put a lot of thought into how best to create their instructions because they were insanely easy to follow.

The first bookshelf took me about an hour and a half to assemble. Iread looked at all the instructions first, counted all the bits and pieces to make sure they were really all there, and went very slowly, checking and double checking each step along the way.
The second and third bookshelves only took about 20 minutes each, if that long. They are even easy to assemble alone, although I think the directions recommend two folks. I had no problem putting them together by myself.
I assembled the first Billy shelf in the office.

That worked great until it was time to slide the back into the bookshelf. I didn't have enough room in the office to slide it in from the end and get it lined up well. That was NOT fun!

Here's how the first lone Billy looked after it was assembled. I couldn't resist trying out a few books on the shelves. The green tape on the wall above is Frog tape. I finished painting the crown molding earlier in the evening, but just hadn't gotten around to pulling off the tape.

Learning from my mistake, I assembled the next shelf in the long hallway outside the office.

This is what the back looks like right out of the box. Hard to believe this is going to be the back, isn't it?

And here it is all folded out. You don't have to use the back at all. When I was toying with the idea of buying the Billy shelves, I googled Billy shelves under Google Images and found pics/sites where folks had chosen to leave the shelves open in back. Once you fill them with books, you would probably never notice they were backless. Or, you might like the look of a painted wall behind the shelves for contrast. I decided I definitely wanted my shelves to have a back.

It was much easier to slide the back in this time. I had room in the hallway to back up and properly line the back up with the bookcase. After you insert the back, there are tiny nails that get hammered into the back along the top, middle and bottom to hold it tightly in place. Super easy...the nails went right in.

This pic shows all three Billy shelves in the office with one "extension" shelf in place. (Sorry about the yucky lighting...these pics were taken at night.) The Billy bookshelves are only $49.99 each. The extension shelf is $15.00, so the extension shelf does add a bit to the cost.

The extension shelf takes the shelves within 2 inches of an eight foot ceiling. Some folks even attach crown molding to the ceiling or to the top of the shelves to give the appearance the shelves are built in.

Next, I combed the house for books.

To begin with I brought in a variety of books, but I ultimately decided to stick with decorating, sewing, crafting, gardening, birding, and art books for the office shelves.

I only have two minor complaints about the Billy shelf. The shelves are only 10 1/4 inch deep, which means some design/art books are going to stick off the shelves. I wish they made a Billy bookcase that was 12 inches deep...that would be perfect.

My other minor complaint is regarding the spacing of the shelves. The center shelf is a fixed shelf for stability, so it's not adjustable. The other shelves are adjustable but many of my design books were so tall, no matter what spacing configuration I came up with for the shelves, some books were just going to have to lay on the shelf or be shelved on their side. Right now they are laying down. As I accumulate more books, I may have to turn them up on their sides, which means they will REALLY stick out. If you have "normal" books and not a lot of decorating books or larger books, this would probably not be an issue.
The extension shelf is a a bit taller and it will accomodate the taller books. But, they end up "out of order" if I stick all the tall ones on the very top shelf (extension shelf). I may eventually do that down the road...but that messes with my OCD gene. ;)

The Billy bookcase comes with a small package containing tools to anchor them to the wall. If I had small children in my home, I would definitely do this to avoid an issue, just in case they decided to climb the shelves. My Billy shelves feel very stable so I'm not worried about them falling forward. But, I would use the anchoring device if I had little ones in the house.
Overall, I'm thrilled with my Billy shelves. It's an amazing amount of book storage for very little expense.

I found some wonderful examples on Pinterest showing a few of the other options available in the Billy shelf. (By the way, Pinterest is still letting me send out invites, so if you wish to join, shoot me an email to betweennapsontheporchatgmaildotcom and I'll send you over an invite.)
As shown below, you can buy glass doors to add to the Billy bookcases. I think they look more expensive/higher end with the doors, but the doors do add a fair amount to the cost. The glass doors are $45 each, so that adds $90 to the cost of each bookcase. The doors for the top extension shelf are $15, so an additional $30 for each bookcase. Some folks glass the bookshelf and leave the extension shelf on top open. It appears that's what they did in this example.

Here's another pic from Pinterest. It's a great example showing how IKEA has designed a Billy shelf for corners so your bookshelves can curve around a corner and keep on going down the adjacent wall.

In this picture from Pinterest, they added the extension shelf to the top, and added paneled doors to the lower half. That's great if you have items you'd like to hide from view on the lower shelves. You can also buy a door that's half glass and half paneled. In other words, it's glass on the top half and a solid panel on the bottom half to hide stuff on the lower shelves.

Total cost for my Billy bookshelves, including the extensions, was only $195. That's a lot of storage for not a lot of money. I think they can be ordered online if you don't have an IKEA in your area. So, that's my Billy Bookcase story. Hope you found this info to be helpful. :)
Tomorrow is Tablescape Thursday...see ya then!
*IKEA did not compensate me in any way for this post, nor did they provide any product. I purchased my bookshelves from my local IKEA in Atlanta, Georgia.
I shared my small (but growing) office library for Met Monday, HERE.

Before my Billy bookcases looked like this...

They looked like this.

As I shopped IKEA on the day I purchased the Billy shelves, I was not really looking forward to putting them together. I won't go so far as to say I dreaded it...but I was just a tad apprehensive.
Many years ago we bought a very large desk with a hutch from an office store, and it had to be assembled. It was a complete nightmare, taking hours and hours. In the end, a crucial part (a door) was missing! I'm thrilled to share, putting together the Billy shelves was the complete opposite experience.
The first thing you notice are ALL of the instructions are done in pictures...no words. At first I was a bit worried...okay, a lot worried. Directions with no words...huh? I'll never worry about that again with anything I buy from IKEA. They have obviously put a lot of thought into how best to create their instructions because they were insanely easy to follow.

The first bookshelf took me about an hour and a half to assemble. I
The second and third bookshelves only took about 20 minutes each, if that long. They are even easy to assemble alone, although I think the directions recommend two folks. I had no problem putting them together by myself.
I assembled the first Billy shelf in the office.

That worked great until it was time to slide the back into the bookshelf. I didn't have enough room in the office to slide it in from the end and get it lined up well. That was NOT fun!

Here's how the first lone Billy looked after it was assembled. I couldn't resist trying out a few books on the shelves. The green tape on the wall above is Frog tape. I finished painting the crown molding earlier in the evening, but just hadn't gotten around to pulling off the tape.

Learning from my mistake, I assembled the next shelf in the long hallway outside the office.

This is what the back looks like right out of the box. Hard to believe this is going to be the back, isn't it?

And here it is all folded out. You don't have to use the back at all. When I was toying with the idea of buying the Billy shelves, I googled Billy shelves under Google Images and found pics/sites where folks had chosen to leave the shelves open in back. Once you fill them with books, you would probably never notice they were backless. Or, you might like the look of a painted wall behind the shelves for contrast. I decided I definitely wanted my shelves to have a back.

It was much easier to slide the back in this time. I had room in the hallway to back up and properly line the back up with the bookcase. After you insert the back, there are tiny nails that get hammered into the back along the top, middle and bottom to hold it tightly in place. Super easy...the nails went right in.

This pic shows all three Billy shelves in the office with one "extension" shelf in place. (Sorry about the yucky lighting...these pics were taken at night.) The Billy bookshelves are only $49.99 each. The extension shelf is $15.00, so the extension shelf does add a bit to the cost.

The extension shelf takes the shelves within 2 inches of an eight foot ceiling. Some folks even attach crown molding to the ceiling or to the top of the shelves to give the appearance the shelves are built in.

Next, I combed the house for books.

To begin with I brought in a variety of books, but I ultimately decided to stick with decorating, sewing, crafting, gardening, birding, and art books for the office shelves.

I only have two minor complaints about the Billy shelf. The shelves are only 10 1/4 inch deep, which means some design/art books are going to stick off the shelves. I wish they made a Billy bookcase that was 12 inches deep...that would be perfect.

My other minor complaint is regarding the spacing of the shelves. The center shelf is a fixed shelf for stability, so it's not adjustable. The other shelves are adjustable but many of my design books were so tall, no matter what spacing configuration I came up with for the shelves, some books were just going to have to lay on the shelf or be shelved on their side. Right now they are laying down. As I accumulate more books, I may have to turn them up on their sides, which means they will REALLY stick out. If you have "normal" books and not a lot of decorating books or larger books, this would probably not be an issue.
The extension shelf is a a bit taller and it will accomodate the taller books. But, they end up "out of order" if I stick all the tall ones on the very top shelf (extension shelf). I may eventually do that down the road...but that messes with my OCD gene. ;)

The Billy bookcase comes with a small package containing tools to anchor them to the wall. If I had small children in my home, I would definitely do this to avoid an issue, just in case they decided to climb the shelves. My Billy shelves feel very stable so I'm not worried about them falling forward. But, I would use the anchoring device if I had little ones in the house.
Overall, I'm thrilled with my Billy shelves. It's an amazing amount of book storage for very little expense.

I found some wonderful examples on Pinterest showing a few of the other options available in the Billy shelf. (By the way, Pinterest is still letting me send out invites, so if you wish to join, shoot me an email to betweennapsontheporchatgmaildotcom and I'll send you over an invite.)
As shown below, you can buy glass doors to add to the Billy bookcases. I think they look more expensive/higher end with the doors, but the doors do add a fair amount to the cost. The glass doors are $45 each, so that adds $90 to the cost of each bookcase. The doors for the top extension shelf are $15, so an additional $30 for each bookcase. Some folks glass the bookshelf and leave the extension shelf on top open. It appears that's what they did in this example.

Here's another pic from Pinterest. It's a great example showing how IKEA has designed a Billy shelf for corners so your bookshelves can curve around a corner and keep on going down the adjacent wall.

In this picture from Pinterest, they added the extension shelf to the top, and added paneled doors to the lower half. That's great if you have items you'd like to hide from view on the lower shelves. You can also buy a door that's half glass and half paneled. In other words, it's glass on the top half and a solid panel on the bottom half to hide stuff on the lower shelves.

Total cost for my Billy bookshelves, including the extensions, was only $195. That's a lot of storage for not a lot of money. I think they can be ordered online if you don't have an IKEA in your area. So, that's my Billy Bookcase story. Hope you found this info to be helpful. :)
Tomorrow is Tablescape Thursday...see ya then!
*IKEA did not compensate me in any way for this post, nor did they provide any product. I purchased my bookshelves from my local IKEA in Atlanta, Georgia.