Framing A Frame

    DIY-Double-Frame-plus-mat

    Once the nightstands were finished, the space between the stand and the accent wall border really bothered me!  I knew the lamp would help fill the space but it sooooo needed something else…..  that’s when I stumbled on this frame within a frame by Crafty Nest.  I wish I could say I was lucky and got mine frames from the thrift store like Ms. Crafty Nest but I purchased my frames new.

    two-in-one-frame

    Here are the two frames that I am going to use.   The large one measures 16x20 and the smaller one holds a 4x6.  I went back and forth whether to use a 8x10, 5x7, or a 4x6.  I decided on the smaller 4x6 because it would provide more white matting, which is something that this room really needed!

    Custom-frame-in-a-frame---backing

    1. Remove glass and the backing out of the larger frame.  Set the glass aside you won’t be using it  {save for another project!}
    2. Cut a piece of heavy foam board the same size as the large photo frame. 
    3. Find the center on the back board that came with the frame. 
    4. Center your smaller frame on the back board and trace around the outside edge of the fame.  DO NOT cut on this line!!!  The small frame would fall through and you won’t have anything to glue the small photo frame to.  
    5. Now before cutting an opening, look at the back of the smaller frame, find out how much space is from the edge to where you insert the photo.  This is how much you can cut away.  My frame had a nice inch border around the back.

    DIY-Double-Frame---Backing

    Only one problem with this!  I couldn’t get to the little tabs that open up the back of the small frame!  Quick fix by removing a bit more of the foam board on that side.   If you run into this same problem, remember the hole isn’t center anymore!

    DIY-Double-Frame---fabric-covering

    Now to cover the foam board.   

    I had some white linen material that I found in the remnant  bin at Hobby Lobby a few months back.  It going to be perfect for this project because it is heavy and has a bit of texture!  

    Cut a piece of  fabric a little larger than the foam board.   Okay you could cut your fabric the same size as the foam board but I hate stressin’ about lining up the edges perfectly, plus I wanted it to wrap the fabric around the back when I place it into the frame.  I’m hoping this will keep the fabric taut.   

    Spay the back of the fabric with spray adhesive and then carefully lay the fabric over the foam board.  Press and smooth down well.  Cut the center out with a big X and wrapped the edges to the back.

    DIY-Double-Frame---fabric-backing-covering

    Assemble the large frame by placing the fabric covered foam board in first, then insert the back board that came with the frame, and lastly press down the clips to secure in the frame.

    DIY-Double-Frame--mounting-small-frame

    Center the small frame on the front and glue. 

    DIY-Double-Frame---opening

    Lift the frame and double check that the opening is aligned and can be opened!

    DIY-Double-Frame---glueing

    Allow the glue to dry for several hours.

    Black-and-white-framed-bird

    I took this photograph through the master bedroom window while it was snowing a few weeks ago!  I thought it would be fun to change out the photos seasonally.

    linen-fabric-covered-mat-board

    Close up of the linen fabric.

    Craigs-list-nightstand

    See how it really fill the space between the nightstand and where the accent wall paint begins.  Love this!

    Carrie

Removing Wallpaper with Wagner: Welcome to the 106th Metamorphosis Monday!

    Meet my new best friend, Wagner. He's a little finicky but for the most part he and I are getting along okay.


    He tends to drool a little and runs out of water sooner than he is supposed to...but that's okay. He gives me an excuse to take a little break every half hour. With Wagner, I can pull off strips of wallpaper this size...


    And sometimes, this size. Pretty cool, huh? Sure beats the heck out of the micro-strips I was able to peel off before Wagner came into my life.


    The Nitty-Gritty: (You can skip this part if wallpaper removal isn't in your future.)

    After trying M-1, DIF gel and regular DIF...and fabric softener today, I found the fabric softener worked the best out of all those. But it was still going painfully slow and very messy. So here was my thinking: Since I have at least two bathrooms I'll be removing paper from in the future, I might as well go ahead and invest in a steamer.

    Lowe's had two sizes of steamers and I went with the bigger one because the handle has a little button that will lock the trigger button down so you don't have to hold it down. It's kind of like when you buy gas, you can lock the little thingy down so you don't have to keep pressing the lever the whole time while you're gassing up your car. That saves a little strain on the hand.

    Wagner isn't perfect, though...he drips just like you guys with steamers warned me about. Mostly he just drips right when you first begin using him after he's been sitting a minute. Apparently, the water in the hose cools down while you're scraping, so when you press to steam some more, some hot water runs out before the steam does. So I found it's best to start at the top, that way when the hot water drips out, it just runs down the wall loosening up the paper, instead of dripping straight onto the floor.

    Also, I found Wagner runs out of water after about 20-30 minutes...not 45 like the little directions say. If you buy one of these, be forewarned that the steam makes the paint/wall pretty soft so it's even easier to gouge the wall if you press too hard. I am not looking forward to repairing all my gouges and nicks. Does anyone have any great suggestions on the best product for that? I was thinking about using one of those light weight spackles.


    One Thing Marked Off the "To Do" List:
    I did manage to mark one thing off the "To Do" list on my sidebar today. I swapped out the old baseball door knob that went with my son's baseball-themed bedroom. It was beginning to deteriorate after 18-20 years. When my son was here for Christmas, he reached for the knob to open the door and was totally grossed out. Apparently, rubber (or whatever it was made of) starts to leak oil or ooze after 20 years. Gross, indeed.


    I went with a normal brass knob. I would have considered going with a different color knob, but since all the knobs in the house are polished brass, I just went with a standard old knob...nothing fancy. Yay...one thing done...a gazillion to go. ;)
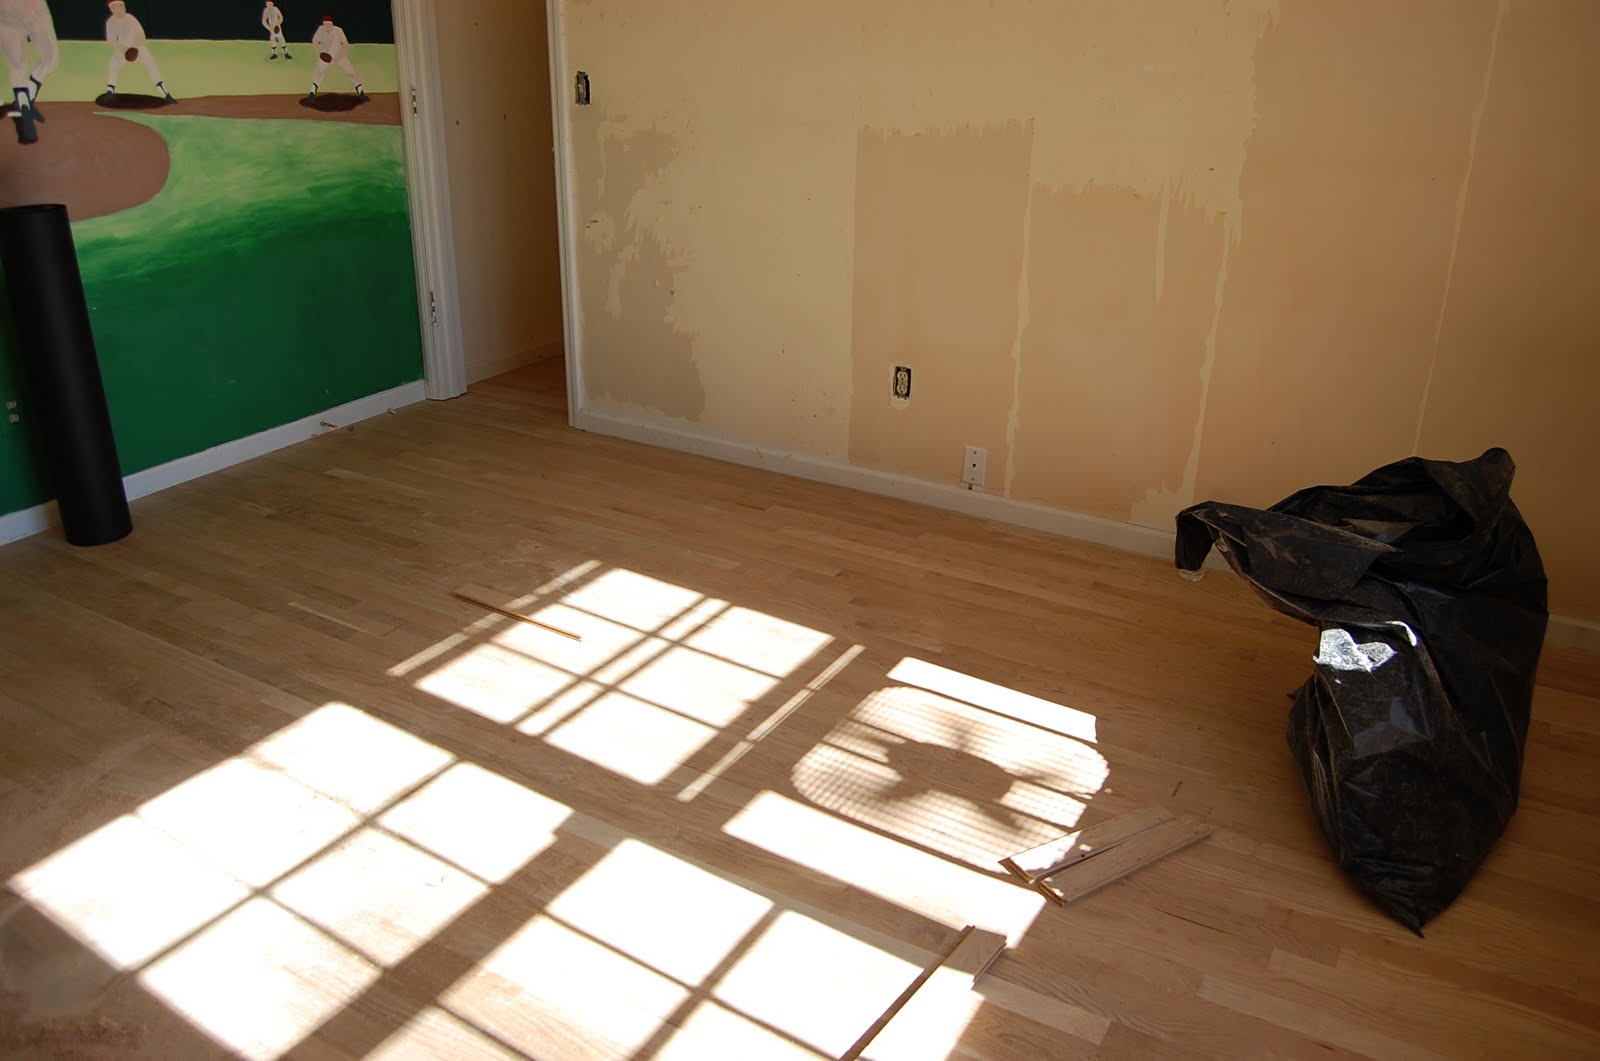


    The hardwood flooring guys are coming back tomorrow and Tuesday to add the final polyurethane coatings to the flooring. Once that dries, I'll be moving the furniture into the room. The cable guy comes out on Thursday to move the connection for the High-Speed Internet to that room. In the meantime, I'm still searching for the perfect rug and light fixture. I have some ideas on the rug but just haven't found one I really love, yet. I wish I could give you guys one huge, awesome reveal...but my rooms tend to evolve as I find the pieces I really love. But it will get there, right? ;)


    A Small Change for BNOTP:

    I made a little change on the blog last night under the header, Tabletop♦NapkinFolds♦PartyIdeas. I separated out all the holiday tablescapes by their specific holiday.

    In other words, the holiday tablescapes are no longer all in one big group, they are now separated out according to the holiday like you see in this screen shot below. (Please Note: This is just a picture so these links aren't active. To view the tablescapes, click on the subject header at the top of the blog and you'll find the live links there.)


    Hopefully this will make it easier to find what you need if you're seeking some ideas or a little inspiration for an upcoming holiday tablesetting. I'm hoping to add links for "holiday decorating" real soon. Most of those will be Halloween or Christmas oriented, I think. I'm trying to make all the the old posts/content more accessible so when you want to refer back to something, you'll be able to find it with ease. :)


    Thank you for all the suggestions you've been making to help with this wallpaper nightmare. But most of all, thanks for all of your encouragement! :) You guys are awesome! I can't wait to see the "Before and Afters" linked for this Met Monday!


    ADDITION: I found an even better way for removing impossible wallpaper. I posted about it HERE. It even beats Wagner! It's what the professionals use and it works!


    I'm linking this post to Sarah's Organize It Party. Thanks, Sarah for hosting!


    Metamorphosis Monday:
    If you are participating in Metamorphosis Monday: Please be sure to add your permalink below, and not your general blog address. To get your permalink, click on your post name, then just copy and paste the address that shows up in the address bar at the top, into the "url" box for the picture linky. You'll also need to put your e-mail address in, but don't worry, it will not be visible to anyone.

    If you'd like to include the MM button in your post, just copy and paste the Met Monday button to your computer or grab the html code from underneath the MM logo under the "Join a Blog Party" header at the top of this blog.

    Please include a link in your MM post back to the host blog, Between Naps on the Porch. Why is this important? When you include a link back to BNOTP, it ensures your regular readers/visitors will find the other awesome "Before and Afters" linked for this Metamorphosis Monday. If everyone links back, this maximizes the visits for all participants.

    Please DO NOT type in all caps...it spreads the links waaaay out. Thanks! :-)

    Let's try something fun today! Please visit the person who linked before you and after you...that way everyone will get some visits. Hope you'll visit more, of course. :-)


    Little Reminder: Thank-you for linking back to this post so the regular visitors to your blog will find all your fellow Blogger's posts linked here for this Met Monday. If you find your link has been deleted, it is because your post didn't mention you were participating in Metamorphosis Monday and didn't include a link back to the other participants and/or was not a "Before and After" subject/project.

Amaze Me Monday #10

    Happy Sunday Everyone! 

    Wow…. where did the week go?  I hope everyone had a great week and weekend.  I’ve spent the better part of  my weekend in the craftroom sewing curtains for my son’s room!   They turned out great and I’ll be posting photos later this week.  

    Tonight I have an out of town house guest coming to stay with us for the week.   See my Hubby invited this west-coast guest to come and stay with us.  The problem….. I have never met this person.  Like don’t even know who they are!     So while the Hubby goes to work on Monday, I get to entertain, for the rest of the week!  This aught to interesting.    What do I talk about?  What do I cook for someone I don’t know?  Unfortunately, this is not the first time.  See I always say, “I can’t say NO to my Hubby and the Hubby can’t say NO to others”!  I have even gone as far as taking over the guest bedroom (aka “the craftroom”) thinkin’ this would solve the problem of unexpected guest but it HASN’T!  Please don’t think less of me.  If it was any of you ladies coming to visit I would be thrilled. See…..we would have something to talk about!  The Hubby’s guest…. I have nothing in common with! 

    Has your Hubby/partner ever done this to you?    


    Oh on another note….

    I have decided to stay with the larger linky photos.  I really like to see your projects as well as so many others.  All I ask, if it begins to take a really long time to upload the blog page, please leave me comment letting me know.  Thank you and thanks for linking up.


    This is so simple that it just caught my eye!  Thanks for linking up Junkin’ Junky

    Valentine frame 3

    A Vintage Vine does a fantastic knock-off memo board.

    Love the look of this chair slip cover by Gracious Southern Living.

    bed and chairs 005

    I’ve been following Michelle from Emerald Cove as she built her daughter this new headboard, however, I was shocked to find out that she built the new one over the old headboard.  Very clever girl!!


    I’m pretty sure I have everything I need to make this project!  Isn’t this just the sweetest Valentine’s art?!?!  Thank you Crafty Girls Workshop for sharing.

    I could get into some serious trouble with these in the house!  Do you know how easy it would be to loose count eating something this fun and delicious shared by Sweet Baby Hiccups??? 1, 3, 5,……oh no 10!


    PARTY!   PARTY!   PARTY!

    Please share your decorating, crafting, tutorial, giveaways and other related projects for another fun week!!!

    Linking up to the party is very simple.

    1. Copy/paste the web address of the specific blog post, NOT your blog home page.

    2. Add a title to your project.

    3. Choose a picture that best shows your project.

    Please grab this button and add it to your post or sidebar.

    Dittle Dattle

House Lust

    The War of the Wallpaper continues and at the suggestion of many readers, I'm giving fabric softener a try. If this doesn't work, I'm heading over to either Lowes or The Home Depot tomorrow to purchase a wallpaper steamer. I will not surrender...victory will be mine! Hear that, wallpaper!!!

    See that baseball wallpaper behind the fabric softener. That's in my son's bathroom and it's adorable paper...but I guess I'll be tackling it sometime down the road, too. It went well with his baseball themed bedroom. If you'd like to see this bathroom, let me know and I'll share it with you sometime. This will be another bittersweet remodel.


    As promised, I opened the sealed door this morning and...


    Here's how the flooring looks so far with just one coat of poly. The color isn't quite golden enough, so we'll work on that when the flooring crew comes back on Monday, but I'm definitely liking hardwood flooring in this room...soon to become my office/study/playroom/retreat.


    I'm having trouble visualizing what I want in this room besides the Pottery Barn Bedford office furniture. I envision a seating area with a lamp and table for those times when I want to sit down, relax and read a bit. This room is going to be more than office. I want it feel a little like a retreat, a fun place. I think I'm going to have to slow down and quit trying to "complete" this room in my head and let it evolve like all the other rooms in my home have done...know what I mean? I'll get the office furniture moved in and "live" in here a little while...then I'll know the direction to go from there.


    On a fun note, Julia at Hooked on Houses just celebrated her Blog's 3 year birthday! Whoo Hoo! I love visiting Hooked on Houses and Julia is one of the nicest, Bloggers you would ever want to meet! In her post about how she first became inspired to start her blog, she talks about getting her inspiration from the book, House Lust: America's Obsession With Our Homes.

    I've been meaning to order this book for some time and I finally did. Julia was right...it's a great read! I don't want to do anything (including remove evil wallpaper) but read this book! It delves into why we not only love our own homes but why we love seeing the homes of others. It also gets into the issue of how the grass is always greener on the other side...the "if onlys" we think about regarding our own houses.


    If you haven't visited Hooked on Houses, be sure to check it out! Julia always has something fun going on...it's a must read for me every day. See you on Sunday evening for Metamorphosis Monday! Can't wait to see what you've been working on in your homes!

Installing Hard Wood Floors in Real Time: Final for Today

    With the sanding complete...


    It was time to evaluate the stain. The wood I always have installed is white oak (not red oak) so I can get a nice amber or yellow sunshine color. Last time a mix of equal parts Natural and Puritan Pine stain worked well to get the color I like. (These are Minwax colors, I believe.) This is the view standing in the hallway looking into the room. The Natural and PP combo is on the left and natural alone is on the right.


    Look how different they look standing inside the room looking toward the door with the windows to my back. The direction of the grain of the wood really makes a difference. I went with just the natural stain because the floors always naturally amber a bit over time. We didn't want to go too dark or amber right now.


    Unfortunately, they finished staining and putting on the first coat of polyurethane and sealed up the door before I realized it, so I missed getting a finished picture. I can unseal the door tomorrow morning and walk on it by 1:00 PM, so I'll share some pics tomorrow. Final coats of poly will go down on Monday and Tuesday. If you missed them, you can view Part 1, HERE and Part 2, HERE and Part 3, HERE.


    Mr. Max listened to all the noise today but never acted scared. Brave kitty. :) Hope you enjoyed following the process of having wood flooring installed. See you tomorrow with a final photo. Have a wonderful weekend!

Installing Hard Wood Floors in Real Time: Part 3

    Floor is in...


    Closet is done, too. Sanding has begun. If you missed them, you can view Part 1, HERE and Part 2, HERE.


    Several folks have emailed and asked what company I am using for my flooring. I love A.L. Thomas out of Buford, GA. (678-546-6970) They have installed/finished flooring in my home before and always do a wonderful job. Plus, they have been in business 65 years! Wow!

Installing Hard Wood Floors in Real Time: Part 2

    Things are moving quickly.


    If you missed Part 1, you can see it HERE.


Installing Hardwood Floors in Real Time: Part 1

    Come along for the journey. :)

    Here's the room this morning.


    This was my son's baseball-themed bedroom and I removed all the furniture recently to create a home office since he's all grown up and has flown the nest.


    Bye-bye old carpet...


    Wish blogs had sound and smell-a-vision. Imagine the sound of saws, air compressors and the smell of fresh wood. Sounds and smells like progress. :) See you a little later with an update...

Blog Archive

Total Pageviews