Two Mysteries: Houdini Squirrel and Every Word

    Mystery 1:
    Today was car-tire(s)-buying day. Yuck. So, as I'm talking on the phone with the guy at the tire store, I opened the kitchen door that leads to the screened in porch. A gray blur ran by. Ummm, not good.

    I walked gingerly out onto the porch and I saw it. And, it saw me. A squirrel. Mr. Squirrel began frantically running around my porch, scaling the screens and in general, FREAKING OUT! I slammed the door, told the tire guy I'd have to call him back and hung up. It was a squirrel emergency!

    I opened the screened door to the deck under the pergola while Mr. Crazy Squirrel frantically tried to exit the other screened door that was still latched. I went back into the house, went around to the family room and came out that door. I tossed a votive candle in Mr. Squirrel's general direction (only thing handy at the moment) and he didn't budge from his resting spot on the top of the swing. I slowly started walking toward him...and it worked. He ran to the other side of the porch and out the open door.

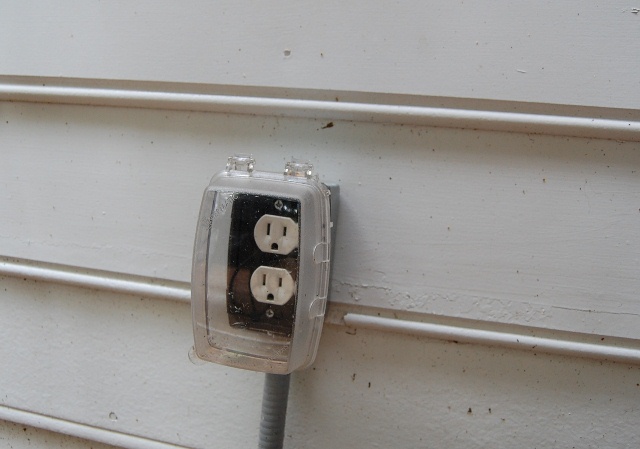
    This is what he had been doing on the porch.


    Every night after the Cardinals finish their late evening visits, I bring in the bird feeders to keep the raccoons from cleaning them out overnight. I always set them over in the corner near the kitchen door, far, far away from the screens. Apparently, wily squirrel was too impatient this morning to wait for me to put them back out, so he just decided to come onto the porch and help himself.

    So, here's the mystery: How in the world did Houdini Squirrel get in??? Both doors were latched. I've done a thorough inspection of every single screen and there are zero holes. I thought for sure he had chewed his way in through a screen but, nope. Not a single hole anywhere. And the screened doors latch really snugly. I pushed on them to check and they barely move at all. Weird, huh?

    Obviously, I won't be leaving the feeders on the screened-in porch anymore. Have you ever had anything like that happen? Bizarre!


    Mystery #2:

    Recently, I treated myself to a Kindle . I'll never, ever quit buying "real" books because I adore them. I love holding them while I read, I love turning the pages, I love seeing them on book shelves, tables...you get the picture. I love books. But I've been wanting a Kindle for travel and times when I'm stuck in waiting rooms...buying tires. Yuck.

    Do you have a Kindle? Here's how it looked when it arrived. I went with a white one but they also have it in a new graphite color, too.


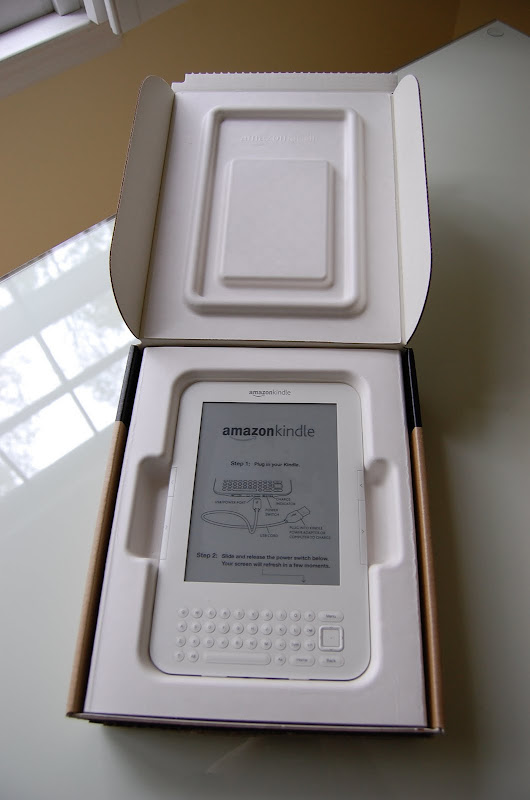
    When you turn it on, it goes through various little screens while it syncs itself to your Amazon account. Once it's charged, it will last about a month with normal use before it has to be charged again. Cool.


    I immediately loaded some of the classics onto it because I love those and they are that magic word: Free! Yay, for free. I also loaded a free game called Every Word...more on that in a sec.


    Nancy Drew Mystery Stories:
    My favorite books from age 8 to age 11 were Nancy Drew Mystery Stories. Every two weeks I took the $2 allowance I earned for keeping the house clean, and walked a few blocks to Joyland Toy Store with my best friend. We would agonize and agonize over all the mysterious and intriguing titles, finally choosing different books so we could swap to read each others when we finished our own.

    Back then, a brand new Nancy Drew book was $1.50, exactly one and half week's allowance...not too bad. It's one of the happiest memories from my childhood. Did you get an allowance? What was your favorite thing to buy? Were you a big Nancy Drew fan, too?

    Now, if you get a new toy, you just gotta have something to keep it safe and scratch-free in, right? An idea popped into my head, and I googled. Sure enough, someone had created a Nancy Drew case for Kindle. I couldn't resist. :)


    I knew this one would be a little too big since mine is a Kindle 3G. But since it snaps, I was pretty sure it would work fine as a carrying case. Besides, it was just too cute to pass up.


    Here's where I need your help. I've started playing the game Every Word. There are 10 levels and I've made it all the way to level 8. Now, I'm stuck. I'm pretty sure I'm allowed a to "phone blog a friend" for assistance. ;)

    So, here's the deal. You're supposed to unscramble the letters you see along the top to create words. As long as you get the longest word (which uses all 7 letters) you can proceed to the next level. I've normally been able to find the longest word right off the bat...even before finding the much easier shorter words. But not this time. Actually, the rules say that you don't even have to find any of the shorter words, the game will let you proceed to the next level as long as you find the longest word. I always try to find as many words as I can, though, because it increases your score and it's fun figuring them out.

    But now I'm really stuck. I just can't seem to create a seven letter word with the letters you see across the top: A M T C S A R. (By the way, the word can't be a name or proper noun.)


    Any ideas? I'm sure someone is going to immediately see it...but it's totally alluding me. UPDATE: Ashleigh figured it out, as did Lori! Man, I should have asked you guys sooner! On to level 9! :)

    Do you have a Kindle? Have you played this game? What's the "funniest" game you've put on your Kindle? Do you just use your Kindle for reading books?

    The game, Code Word is a lot of fun too. You can yell at thank me later when you find yourself spending hours deciphering code words. Think of it as exercise for your brain. :)

    Giveaway Reminder:
    If you haven't yet entered the wonderful giveaway for gorgeous jewelry from Styling by Coty Farquhar, click HERE to enter.

Growing Up in the Tornadic South

    Growing up in the south, tornado sirens are a way of life. I can remember playing four-square on the playground of my grammar school while the practice tornado sirens went off each week on the same day at the same time. In a way it was reassuring, a sign that a warning would sound if danger was stampeding its way toward your home. Thankfully, they still do the same thing in the county where I live now.

    Living in the south, you tend to get a bit complacent. I've been through so many tornado watches, warnings and actual tornadoes, I've gotten used to the fact that every spring is going to be a wild ride. You don't like it, but there's absolutely nothing you can do about it.

    Talk to anyone who has grown up in a southern state and they will have a number of harrowing tornado stories to share. All this is to say, I'm used to tornado warnings and tornado sirens, but what I'm not really used to is hearing and seeing our local TV weathermen so wound up days preceding bad weather. I knew "something evil this way comes" because all week our local weathermen had been almost frantic in their constant warnings on the evening news. A friend e-mailed Wednesday to say, "Glen Burns says he isn't kidding." Glen Burns is one of the most respected weathermen on the Atlanta news. If Glen Burns wasn't kidding, I knew we were in for major trouble.

    If you're a Facebook fan of BNOTP, you may remember a comment I left on the BNOTP wall the evening evil was making its way to the south. The more I listened to the news on Wednesday, the more nervous I became. After a while I turned the sound off and just watched the red blobs moving across the weather maps, paying close attention to where they were going and how far they were from the Atlanta area. Almost all our weather comes from the west, by way of Alabama. Alabama is our crystal ball; whatever they get, we usually get the same.

    Having lived through so many spring tornado seasons, I know when it's time to grab Max and head for the basement. Every tornado I've ever been through has always been immediately preceded by hail. If tornado warnings are out and you hear hail, forget the TV and the sirens; it's time to grab the family, the cell phone and the flashlight and get to your safe place, which in my case is the basement. And if it sounds like they have just relocated train tracks to your back yard and the train is coming down the tracks, you've waited too long. When a tornado is knocking on your door, it really does sound like a freight train. It is deafening and a terrifying experience.

    I got very lucky Wednesday. See that skinny line I drew on the map below? Follow it to the blank white spot in the midst of all the red dots. That's where I live. Luck, just pure luck.


    If you'd like to help those who weren't so lucky, you can donate to the Red Cross ONLINE or just text the word REDCROSS to 90999 to make a $10 donation. It's my understanding it will appear on your next phone bill.

    I'm saying lots of prayers for all the families who bore the brunt of our recent storms. May God bless them and their families as they struggle to turn their world back right side up.

Ottoman Slip Cover

    I’ve been inspired by the many wonderful projects that I have been seeing using drop cloth material!  But the real icing on the cake had to be when I watched a wonderful series of videos by Miss Mustard Seed!!! Have you seen these videos? The whole time I watched the videos I thought of the sad lil’ chair that I have sitting in the corner of the living room in desperate need of a makeover.  Plus my living room is a bit dark and I would love to lighten and brighten it up for the summer months.

    Okay….. So I thought to myself…. I’ve never worked with a drop cloth before and I have never made a slip cover before, maybe I should try something easy for my first project.  How ‘bout that disgusting (years of abuse by three kids and two dogs) ottoman that is crying out for help! 

    Okay so the ottoman it is!

    Drop-cloth-ottoman-slip-cover

    I started by washing the drop cloth material as per Miss Mustard Seed and then on to the making the piping.  Miss Mustard Seed sews her piping with straight strips of material, but I covered my  piping on the bias using the largest cording that I could find at Wal-Mart. 

    Box-Pleat-slip-cover

    I started at the top of the ottoman and worked my way down to the bottom. 

    Pinning… pinning… and more pinning. 

    At the last moment, I decided to add a box pleated hem to the bottom.  Which left me short on material from my original calculation to complete the slip cover.  Don’t you just hate when that happens?

    drop-cloth-slip-cover

    I purchased another drop cloth only to find out that NOT all drop clothes are created equal!  Hello!  This was a news flash to me.   The second one, even though it was the same weight and dimensions as the first one I picked up, was heavier and darker in color.  Off to the store I go to purchase a third drop cloth which it turns out is lighter in weight and a smidge too dark in color.  Waving my white flag, I settled with the third drop cloth simply because I live about 30 minutes away from the nearest hardware store.  The darker of the third drop cloth I placed towards the back corner. So far no one has noticed.  (Well, my mother hasn’t been by to see the slip cover yet!  jk)  

    _Clipcover-ottoman

    The piping and the box pleat hem takes this project from looking like a beginner project to a custom ordered slip cover!  Don’t you just want to try to make one today?

    Before-ottoman

    I just realized that I probably should show you the ottoman without the slip cover.  Yes, my Dad made the box and the cute little bun feet and then I upholstered it.  The ottoman is tufted with  9 buttons on the top.

    Now on to that chair…..

    Carrie

Styling by Coty Farquhar: Welcome to the 140th Tablescape Thursday!

    Hi Everyone!
    Happy Tablescape Thursday! I have a wonderful Giveaway this week for Tablescape Thursday. This giveaway will have 6 winners so lots of opportunities to win!

    I'm so excited to share the gorgeous and breathtaking designs of Coty Farquhar. Are you familiar with her blog, Styling by Coty Farquhar? If not, you are in for a wonderful experience!


    Coty lives in one of the most beautiful places you can imagine, the Southern Highlands of New South Wales in Australia. Her lovely studio is in the town Moss Vale. Even the name of the town sounds magical, doesn't it?!


    Coty designs, styles, produces and photographs all her own amazing work. I am so excited to announce she is currently working on a book! I can't wait to get my hands on her book! If it is one/tenth as gorgeous as the work I've seen on her blog, it will be amazing.

    Whether you are planning a wedding, anniversary, party or a special event, Coty can make it into a dream occasion with her talent for exquisite styling and presentation.


    Her beautiful blog is overflowing with inspiration and ideas.


    While I was drooling over her stunning photography earlier this week, I was so inspired I came up with an idea for a future tablescape I can create underneath my pergola. It's impossible to visit Styling with Coty Farquhar and not come away with at least a dozen new ideas for your home or an upcoming event.


    Tablescape Thursday:

    For this Tablescape Thursday, I'm sharing one of my very favorite tablescapes from Coty's blog. Coty had a rare day off from her design work a while back. While home, she glanced out to her back property and notice an apple tree covered with the last blossoms of the season. She was inspired to catch this fleeting moment before all the blossoms were gone for the year. These photos convey so beautifully how Coty can transport you to another place with her eye for design and gorgeous imagery.


    Giveaway for Tablescape Thursday:

    Coty is sponsoring a generous giveaway today for the readers of BNOTP. In her Studio in Moss Vale, she carries beautiful furniture, paintings, prints, collectibles and gorgeous jewelry. Coty wanted to do something special for BNOTP readers so she is giving away a pair of earrings to six very lucky winners!

    Coty sent over these beautiful images of the earrings; even her giveaway images are gorgeous! How I wish I lived in Moss Vale so I could visit the studio in person!


    Beautiful!


    I have to confess, I'm in love with those darling pearl earrings!


    How To Enter This Giveaway:

    To enter this giveaway, become a follower of Coty's gorgeous blog, Styling by Coty Farquahr. Don't forget to leave a comment on THIS post letting me know you are following so you'll be entered in the giveaway.

    For a Second Entry: Like on Facebook
    For a Second Opportunity to win, "Like" Coty Farquhar on Facebook HERE. Please leave Coty a comment on Facebook letting her know you are participating in the Giveaway here at BNOTP. Don't forget to leave a second comment on THIS post so you'll double your chances of winning.

    For a Third and Fourth Entry:
    If you like, you can also enter a Third and Fourth time by Tweeting about this giveaway or by posting about it on your blog or sidebar. Just don't forget to leave a comment for each entry letting me know you Tweeted or Blogged about the Giveaway so your name will be entered a 3rd and 4th time. Giveaway ends at midnight on Tuesday, May 3rd.

    Remember, there will be 6 winners so lots of chances to win in this fun giveaway!

    Looking forward to viewing your beautiful tablescapes!


    Please Read:
    If you are participating in Tablescape Thursday, please be sure to add your permalink below, and not your general blog address. To get your permalink, click on your post name. Then just copy and paste the address that shows up in the address bar at the top, into the "url" box for the picture linky. You'll also need to put your e-mail address in, but don't worry, it will not be visible to anyone.

    If you'd like to use the Tablescape Thursday logo button in your post, just copy and paste it to your computer and upload it to your post as you would any photo. Or, just grab the html code you'll find under the "Join a Party" heading at the top of this blog.

    Please, link back to the host blog, Between Naps on the Porch. This is important because it helps those who are visiting your blog, find the other wonderful tablescapes posted for this Tablescape Thursday, thus increasing visits for all participants.

    Please, don't add your post name/blog name in ALL CAPS...it tends to create big spaces between the rows of links. Thanks!

    Let's try something fun today! Please visit the person who linked before you and after you...that way everyone will get some visits. Hope you'll visit more, of course. :-)


    Welcome! Thanks for coming to the party!

9 Great Features for a Screened-In Porch

    A little over three years ago I was faced with a big decision. I had a badly deteriorating deck and I knew if I didn't replace it, I would surely have to replace it before I ever listed my house to sell one day. How often do we do that...wait until it's time to move before we fix things or make improvements we've dreamed of for years? Then it's the next homeowner who gets to enjoy our hard work. If you've been putting off a little home renovation dream, don't wait until it's time to move. Do it for you and enjoy it now.

    My deck had lots of issues. Boards were popping up and splintering and the previous homeowners had added an addition that was a drop off from the original deck. It was really a hazard and was just an example of poor planning and design.


    Also, the steps stuck out into the center of the yard and took up a lot of space in addition to just being unattractive. It was clear the best course of action would be to tear off the old deck and start from scratch.


    As I began the process of getting estimates for the porch, I immersed myself in all things "porch" by reading books about porches and searching online for pictures and ideas.


    In the end it was clear, I wanted a traditional porch with an old fashioned porch feel...the kind of porch where you could spend lazy afternoons sipping sweet iced tea with friends...or alone, reading, napping and enjoying the breezes.

    Now, I certainly don't claim to be an expert on everything you need to know about adding on a screened-in porch, but since it's springtime and porch time, I thought I'd share what I have learned and have come to value in a porch in hopes it will prove helpful for you.

    As I always say, please take what you can use from this post--what suits your needs, then just discard the rest. The porch of your dreams might look very different from the one I added, but hopefully you'll glean a few new ideas from my experience.

    As with any renovation or addition, the most important place to start is by sitting down and making a list of how you want your new space to function once you're done. How do you plan to use the space? What activities will take place there? What needs do you want this space to meet?

    When I began planning the addition of my porch, my list included:

    1. Lots of seating
    2. Roomy enough for friends and family
    2. A place to dine
    3. No Mosquitoes or bugs getting in
    4. Soft lighting for evening time
    5. Ceiling Fans
    6. Music

    Looking at my list, you'll see my plans for this space were pretty basic...nothing too out of the ordinary. While I was in my research phase, I saw porches with wide screen TVs and Jacuzzis. Though those weren't features I wanted for my porch, they might be features you would like. Dream big when you're making your list. You can always scale back your plans later if needed.

    It's important to read and research a lot in the planning stage because you don't want to spend money adding a screened-in porch to realize later you left out something you really wanted. As you read and research, jot down ideas and questions so you'll have a list once you start getting estimates for your addition.

    I've been asked before why I didn't add on a sun room. That's a little like asking a person why they bought a convertible car when they could have a hardtop. I really wanted a porch, not another cooled and heated space. I do love sun rooms, but that just wasn't what I wanted. Now that I've had a screened-in porch, I'm totally ruined. I never want to be without one again, if I can at all help it.

    I could write volumes about all the things I learned in the process of adding on a screened-in porch, but today I thought I'd share 9 of my most loved features for a porch.


    Size:
    Size is pretty important when designing a screened-in porch. My deck was 18 feet long and only 12 feet deep, which seemed deep enough. The contractor I used encouraged me to build my porch 2 feet deeper making it 14 feet deep. I'm so glad he did. He told me he had never had anyone call him back and say they wished their porch was smaller, but that folks always regretted if they had gone too small in their design.


    Mosquito-proof Flooring:
    There are a number of options for porch flooring. I avoided regular decking because there are always gaps between the boards which means you'll need to screen under the flooring to keep all the bugs out. Yep, folks do screen under the flooring. I've seen it done while on house tours.

    I wanted my porch to feel more like an extension of the house, like a room that just happened to be outdoors, so I went with tongue and groove KDAT wood. KDAT stands for Kiln Dried After Treatment. Just "Google" KDAT flooring and you can read all about it.

    My contractor originally tried to convince me to use tile. A tiled floor was not at all in keeping with the feel I had envisioned for the porch. I wanted an old fashioned looking porch floor. He did talk me out of painting the flooring and staining it, instead. I still love the look of a painted porch floor, too. I even like it when they start to show some wear and look a little worn.

    Staining the flooring created a really nice transition from the inside of my home to the porch. My contractor had my flooring professionally installed by a flooring company and they glued and nailed it down to ensure it didn't warp in the humidity we have during the summer months. He also used a really heavy-duty subflooring underneath it for extra stability. If you use KDAT wood for a porch floor, just follow their recommendations for installation.


    Dining Area:
    One of my favorite features on my porch is a dining area. Meals just taste better out on the porch. I recommend allowing room for a table that will seat at least 4, preferably 6 or even 8. Just imagine all the breakfasts, cookouts and dinner parties you can have with friends and family out on the porch. (This tablescape is available HERE.)


    China Cabinet:
    If you've allowed room for a dining space, put a piece of furniture out on the porch for storing the china you'll be using every day. It will make it really easy to dine outside whenever you're in the mood.


    You may need to take things out each spring and give them a quick wash for the season, but it really comes in handy having a cabinet close at hand for storage. You can see how I painted the cabinet I use on the porch in THIS post. This piece was only $95 at a local antique/thrift store and I painted it with an exterior grade paint. It's still holding up well and it has been through some bitter winters and super hot and humid summers.


    Ceiling Fans:
    You gotta have ceiling fans. Not only do they caress you with cool breezes, they add so much ambiance and romance to the porch. Even when it's not that hot outside, I'll turn on the fans at their lowest setting just to enjoy their slow movement as they gently circle overhead. One fan is good, two is even better if it's a good size porch.

    Be sure to buy "exterior" grade fans. You can get away with interior grade fans...for about a year. But before long, the heat and humidity will cause the blades to droop. It's not a pretty sight when that happens. Also, the housing and inner parts of the fan may rust and cease to work. Exterior grade fans don't cost that much more and are the smarter way to go. They come in a gazillion styles. I found some online at Lowe's with a wicker look to go with my wicker furniture.


    Lighting:
    Lighting is so important in any space, be it indoors or out. I'm not a big fan of overhead lighting, but I love lamp light. So when I designed the porch, I ask my contractor to include a lot of outlets. I think he thought I was crazy.


    It added some expense to the cost of the porch, but it was so worth it. I have four outlets on the porch itself. One outlet was already on the wall behind the hutch, the other three were added. That's how I get the soft lamp lighting in the evening. If you're wondering about rain and having outlets on the porch, just check my FAQ at the top of the blog.


    Out on the decks, the outlets have special covers over them and they work great.


    That's how I was able to create this tablescape on the deck. This outlet is located under the window. (Tablescape can be viewed HERE.)


    I also use it for a fountain I put out occasionally. There are two more outlets on this deck. One is for the gas grill because it has a light inside and the other was for lighting I had strung around under the handrail.  They also come in handy for plugging in electric blowers when you need to blow off the deck.


    Music
    The only thing better than decompressing under swirling fans on a screened-in porch is doing it to the sound of James Taylor or Michael Bublé singing your favorite tunes. This is your chance. You're adding on a porch...pre-wire that baby right up front for some great outdoor speakers.

    I had the porch pre-wired and a speaker placed over each door leading out to the decks. You can also enjoy the music while on the decks. Again, make sure you use speakers designed for the outdoors; regular speakers won't hold up.


    A Swing:
    I have to be honest, I've never been much of a swing person. Or, at least I thought I wasn't. I like to be stationary when I'm sitting--not real crazy about swaying to and fro. But the porch had a spot that was the perfect size for a swing due to the fireplace box that juts out into the porch.


    I knew I wanted a seating group in that area. A swing seemed like a great way to finish out the seating instead of just having another settee or more chairs.

    Now about this swing thing...be forewarned, swings are people magnets. Your guests will totally gravitate to it. It's always the first place they head. When I have friends over for a cookout or party, someone always goes for the swing and stakes it out before anyone else gets a chance.


    You may not be a big swing person, but your guests will be. You can count on it. A swings adds something special to a porch...hard to describe. You need a swing.


    Ceiling Height:
    I saved this for last because it's not always something you can design into a porch, but I recommend it if you can. If you have the room and your house will allow, go "up" in your design. Raise the ceiling. It will make a smaller porch feel much bigger, plus it really helps the porch feel even cooler. Height will add to that airy, summer-breeze feeling you are seeking out on a porch.


    If you're thinking about adding a porch, go for it. It may just become your favorite "room" in your home.

    If you have any questions about the porch, please check the FAQ at the top of the blog. If you don't see your answer, feel free to e-mail me. It may take me a day or two to get back, but I'll do my best to respond.

    You can read more about the construction of the porch HERE.

Spring Break Projects

    Well, spring break is over and it’s time for the kiddos to get busy with their last few weeks of school before summer break.  I did manage to get a few things crossed off my want/need T0~Do list.

    *If you are my Facebook buddy then you may have already seen pixs of these projects.

    First thing I tackled was re~staining a bench and glider that my dad made many years ago with the left over stain from redoing our deck.  

    wooden glider

    The bench and glider weren’t as faded as the deck and still had some stain on them.  Even with some light sanding,  they still had some stain on them.  The Sherwin Williams deck stain that I purchased was a translucent color and I just knew it wouldn’t give an even color.  So I mixed up a combination of a few stains that I had left.  I wasn’t really too concern with the color because I already knew I liked all the stains that I had in my arsenal.   Once that coat dried, I went over it with the SW stain, figuring that it would provide the best protection for the outdoor elements.

    The birds have already put their mark it! ick

    wooden bench

    Okay, so I shamelessly moved this cute little bench to this spot so that I could use my spring time “IRIS” display as a backdrop!

    Purple Iris display

    Lovely!!!  Only a few short years ago I picked up one iris tuber and after dividing them a few times over the years, it has turned into this huge iris garden.  If anyone lives close to me and would like a few for their garden, I would be happy to share! 

    Cricut Cover

    Here is a real quick project! 

    A cover for my Cricut machine.  I have been tossing the idea around as to whether or not I needed a cover  because I use it so much.  Would it be necessary? That is until…. the pollen arrived!! 

    And there is one more spring break project that I have to share with you but that will have to wait until tomorrow!

    Carrie

Blog Archive

Total Pageviews